GUIDELINES FOR LIVE (ONSITE) PRESENTATIONS
As you make final preparations for your in-person presentation at the JMIH Annual Meeting in Phoenix in July, please use the following information to prepare.
- 1. Regular oral presentations are scheduled as 15-minute presentations which includes time for you to walk to the podium, be introduced by moderator, and initiate your computer files. Please plan your actual presentation to be completed in 12 minutes; allowing time to answer questions as these make the sessions much more interactive. Time limits will be strictly enforced.
- 2. Every session at the meeting will be furnished with a PC computer and a computer projector. Computer projection slide format is 16:9 but 4:3 presentations will work fine. They’ll be centered with vertical black bars present on the sides. Please bring a copy of your presentation file on memory stick (USB). All presentations MUST be uploaded ahead of time or in the Speaker Upload Room on site the day before your presentation.
- 3. Presenters are strongly encouraged to have their presentations available in the PowerPoint and/or PDF formats. The following equipment will be provided in all the session rooms:
- PC computer (not Mac) with PowerPoint and Adobe Acrobat software
- Data-video projector and white projector screen
- 16:9 format (wide screen); 4:3 presentations will still display correctly
- Wireless Slide Advancer
- Podium Microphone
- 4. Presenters MUST come to the Upload Room (Phoenix Convention Center, West 104 AB) to turn in your presentation. There will be a PC with Windows and Microsoft PowerPoint computer in the ready room and each session room. All presentations that will be presented live will be put into the meeting format and loaded on the computer from the AV team. The laptop will be running the virtual platform, SignalWire.
- 5. If you have any difficulties, tell the staff in the Ready Room and they will have an audio-visual technician meet with you to resolve the problem.
- 6. Delegates who will be giving presentations live are responsible to:
- Upload their presentation to the PC computer in the slide review room at least 24 hours in advance.
- Arrive at least 15 minutes prior to the start of the session and introduce themselves to the moderator of the session.
- Please note that a student volunteer will be available in the session rooms to assist with any audio-visual equipment problems that may arise.
- All presentations will be recorded through SignalWire and will be available through JW Player for those that have registered for the meeting.
- 7. The Windows computers provided will accept .PPT, .PPTX, and .PDF. Keynote presentations will need to be converted to PowerPoint or PDF as they will not work on JMIH computers.
- 8. The screens in each session room will be in 16:9 format. but 4:3 presentations will work fine. They will automatically be centered with vertical black bars present on the sides.
GUIDELINES FOR VIRTUAL PRESENTATIONS
The JMIH Annual Meeting will be a hybrid meeting with both attendees and presenters either in person in Phoenix or virtual from home. We will be using a streaming platform called SignalWire for the meeting. All participants must be registered for the meeting for both options. Speakers will be sent a link to log in to Signalwire and should join their session for the Q&A after each pre-recorded video is played virtually. Follow the steps below to join and look for the email with a link to upload your talk.
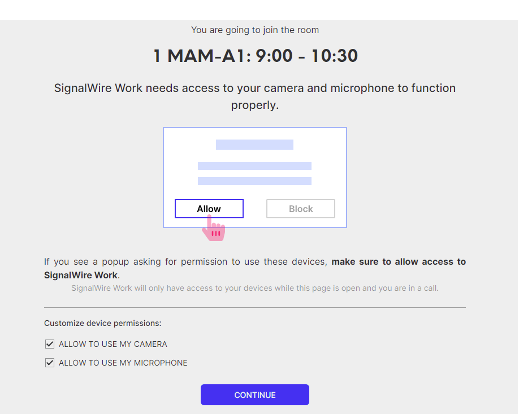
- 1. Click on the link and enter your name, email address and password on the Hello! screen. Once you are on the meeting site, you will find your session title and time as one of the session rooms. All attendees will enter the room muted with no video. When it is your turn to answer Q&A you will need to unmute your audio and video.
- 2. There will be a room named Virtual Speaker Ready Room. All speakers can enter that room anytime and talk with the AV tech monitoring SignalWire. Virtual speakers should join the speaker ready room 20 minutes before your scheduled session to test your microphone and screen sharing capabilities.
- 3. Virtual attendees will be asking questions using the chat feature. We will have a student monitor the questions and ask them from the meeting room in Phoenix. Virtual speakers will be able to hear the questions and answer accordingly at the end of the presentation.
- 4. Save your file as last name-date of presentation-title of presentation i.e Smith-7-21-the frogs that bump in the night. An email will be sent the week of June 28th with where to upload.
STEPS TO PRESENT VIRTUALLY:
Virtual presenters presenting JULY 21-23 - Presentation upload date is JULY 12
Virtual presenters presenting JULY 26-27 - Presentation upload date is JULY 19
All virtual presenters MUST attend the practice session, this will ensure that you know how to navigate the platform for your Q&A.
The 2 dates for these are July 8 from 11 am-12 pm and July 15, 2-3 pm. You will only need to spend about 5 minutes in the session.
All virtual talk presenters must pre-record their talk as a video in either a 5-minute for lightning presentations or 12-minute style.
Composing your talk
Presenters can compose their talks using any presentation software (e.g., Powerpoint, Keynote). Any aspect ratio can be used, but we recommend using a modern widescreen mode (16:9), because the video viewing window in SignalWire is optimized for that size. If you choose to use a standard mode (4:3), there will simply be black space to the sides of your video (and there’s no problem with that; you’re just taking advantage of less screen space).
Recording your video
Presenters can record themselves giving the talk using free Zoom software or any other software of choice (e.g., Loom or Prezi). The general recording process is the same as many people are familiar with, particularly for those who have been recording lectures for online courses. If you’re not familiar with recording a presentation on your computer, the easiest thing to do is to ask a colleague how it works. There are also many resources online; here are some instructive websites with many video examples:
- UC Davis put out comprehensive instructions (August 2020) on “Creating a Video Presentation for a Virtual Conference.” Here you will find everything from vocal warm-ups to Zoom tutorials, and also short video examples (look at page bottom).
- Botany’s society put out detailed guidelines for their virtual conference (July 2020) with “Tips for Pre-recorded Presentations at Botany.” They included recommendations for video, audio, background styles, and examples of Do’s and Don’ts to virtual lectures. You’ll find many example videos for recording in Zoom or other services like Prezi at the page bottom.
- Here is a step-by-step written guide for recording a pre-recorded video in Zoom from Harvard’s Derek Bok Center for Teaching and Learning.
- Here’s a really nice step-by-step video guide for recording a pre-recorded video (9 min). It was made for a non-scientific event, but his advice on the process is perfect and provides all the specific details you need to make your talk video.
Dr. Mary Salcedo also has a few tips on working with your face on Loom or Zoom. Enjoy. (Also note: it’s possible to change the size of your face box in Zoom as well.) If you record by Zoom to the cloud, it seems to have trouble with the placement of your face. We recommend recording directly to your computer instead.
Generally, we encourage (but do not require) that you record your face while you are giving your talk—many people like to see faces rather than just hearing a disembodied voice. If you choose to record your face, our suggestion is to position the window in the right corner of your slides. When you’re composing your slides, make sure to leave space for that “face” window and also captions. We encourage recording a practice video (only 30 sec) to test out your slides, caption services, and other design elements.
If you use a program like Zoom, you can choose to record the file to your computer or to the cloud. If you record to the cloud, Zoom will transcribe the audio of your talk. You can retrieve the audio transcript when you log in to your Zoom account and also download the video. From there, you can edit the transcription where needed. If you want to use this transcript to put captions on your talk (which we encourage but do not require), you'll need to go a step further. If you are going to add captions, make sure to leave a small row of space on the bottom of your slides for caption text.
There is a section at the end of this document with detailed instructions on how to make captions.
Video file format
The file format of the recorded video presentation can be .mp4, .m4v, .mov, .webm (Note that Zoom’s native output format is .mp4, so if you use Zoom, you can upload the file without a change in format). Keep in mind that for the virtual days (July 26-27) the files will be played from the moderator’s computer.
Presentation tips and best practices
- Set your camera at eye level: Often, this means propping up a laptop.
- Position your self-preview window near your webcam: Use your mouse to move your video preview of yourself close to your webcam. This will encourage your eyes to look near the webcam, rather than off to the side, giving your viewers the impression that you are looking at them.
- Check your light: The best lighting is diffused, from both sides and not overly bright. Two small lamps on either side of your computer, placed slightly behind the camera, is a simple way to achieve attractive lighting. Avoid having a window or bright light behind you, as this may cause your face to be under-exposed.
- Charge up or better yet, plug in: Ensure that your computer and audio equipment are fully charged.
- Green screen: Zoom has the ability to create "virtual backgrounds" behind you. These are not required, but can be handy to obscure a cluttered background. These work best if you have a true "green screen" behind you, but it is not strictly required if your computer has sufficient hardware. Click the up-arrow next to the "Start Video" button on your Zoom toolbar to access the virtual background feature. Choose from the images provided or upload your own. We recommend nature photos from unsplash.com, but remember, keep it simple! You are the star, not your background.
- Silence the interruptions: Turn off your phone and exit any programs that might pop up notifications during your presentation (e.g., Slack, Outlook, Skype, etc.) Note that an iPhone, particularly, will ring on a Mac that's attached to a phone, even when muted. If you have pets, children or other minions, take precautions to ensure that they do not disturb your presentation.
- Practice a short video: Before you record the whole talk, and with your set up ready-to-go, record a short video of several slides. This will help you figure out which recording platform might be best for your talk. If you are showing videos of your system, practice these slides and check for lag. Listen to your voice and check for sound quality. In Zoom, you can set audio preferences to avoid using your headphone microphone, which may not be as good as your computer.
- Use a video editor: You don’t need to make the perfect video recording. Viewers are ok with natural speaking, which includes the occasional ‘um’ and ‘uh’. If you need to trim your video (particularly for the beginning and end bits), use a free video editor. There are many available; here’s one list. Quicktime Player 10 (native to Macs) or Quicktime Player 7 (Macs or PCs) are both actually very easy to use. In 10, select Trim in the Edit menu; in 7 you simply select the sequence of interest using the small triangles, and then cut and save the movie.
Adding captions to videos
[Thanks to Dr. Mary Salcedo for putting it together.]
There are many services to caption your videos, we are providing one method that can be used to make sure JMIH 2021 videos are accessible.
The general process is:
- Record your video
- Autogenerate or write a transcript file
- Upload your video and transcript file into a video processing software
- Burn or permanently embed transcription
Plan ahead: this is not going to be a fast process the first time you do it.
First, it is recommended doing several test videos of 30 seconds. Decide on your presentation software and make sure the design works. If you show animals moving or dynamic movement, select those slides as tests. You can see a short video of me using a service called Loom in a short video (2 min), “Loom: When recording, consider your face!”
If you have time before the submission, go through the whole process (record, transcribe, burn captions to video) on the 30 second test video and be sure the captions are not covering key figures or text. Otherwise, be mindful for your first version, and then do captions for the second upload window.
Autogenerate a transcript and edit
Zoom: Record to the cloud and receive an auto-generated audio transcript
This resource document, made by the University of Houston, talks you through “Adding Captioning to Zoom Recordings”, and it is comprehensive, with screenshots and instructions.
When you’re ready to record in Zoom, you can “record to the cloud” instead of your computer, and it will automatically caption your video. Use a test video to make sure you’ve set your layout correctly. (Note: I personally am having difficulty recording only a thumbnail-view on Zoom cloud recording, even though it seems possible). The auto-generation of your video transcript may take time (minutes to hours, some delays expected), but be patient -- Zoom will email you once your video file is ready, and also once your transcript file is prepared. You can then click on the recording, and edit the transcript directly. You can even trim your Zoom video here. Editing the auto-generated transcript is very important as names and scientific jargon are likely not correct (e.g. ecdysis was transcribed to “act ISIS”).
The document linked in this section goes through how to take the transcription .vtt file and apply it to your video. Common techniques include using freely downloadable video processing softwares like VLC or Handbrake.
Write it yourself
Add captions yourself using Youtube -- apply captions with Handbrake
After experimenting with the Zoom transcript and also writing out the script myself, I found that I prefer captioning my video, phrase-by-phrase. Why? The timing seemed more accurate, while Zoom tends to give you phrasing per larger blocks of time. This is a matter of preference!
My process goes like this:
Add captions yourself using Youtube -- apply captions with Handbrake
After experimenting with the Zoom transcript and also writing out the script myself, I found that I prefer captioning my video, phrase-by-phrase. Why? The timing seemed more accurate, while Zoom tends to give you phrasing per larger blocks of time. This is a matter of preference!
- Record video using Zoom/Loom/Prezi. However, I personally like using Loom because of its added features (like trimming a video), commenting, and linking abilities. The free version of Loom only allows 5 min video maximums - so I may use Zoom (recorded on my computer, not the cloud for the thumbnail version) for JMIH.
- Download said video to your computer
- Set up a Youtube account (if you don’t have one already)
- Upload your video to Youtube (you can keep this, and all your videos private)
- Click “Manage videos”
- Watch the brief (4 min) tutorial on “Transcribing a Zoom video yourself (using Youtube) #1”
- Note: you can preview your subtitles (they appear on the video as you do them). You do not need to publish the video (if you are worried about that) to see the subtitles (but it does help). Click “Save draft” when finished -- and then you can download the transcription file (.srt) by clicking on the “^” button.
- Transcription may take awhile - be patient, press “save” and relish in the fact that you’re going to have great captions. I personally found it fun!
- Download the Youtube transcription -- a .srt file
- Download and start up Handbrake
- I was completely unfamiliar with Handbrake, and this step-by-step of “How to Add Caption Files to Videos in Handbrake (Subtitles and Captions)” has clear pictures and text.
- These are simplified steps from the above link:
- Click “Open Source” and select your video
- Go to the Subtitles tab, click “Tracks” and “Add external track” then select your .srt file
- Select “Burned In”
- Go back to “Summary” tab
- Click “Add to queue” and “Start” if everything is in order
Your video will now have captions!
ADDITIONAL INFORMATION
- Add captions yourself using Youtube -- apply captions with Handbrake
- After experimenting with the Zoom transcript and also writing out the script myself, I found that I prefer captioning my video, phrase-by-phrase. Why? The timing seemed more accurate, while Zoom tends to give you phrasing per larger blocks of time. This is a matter of preference!